Pro features
Automation, Image Processor, Series from CSV, the AI Content Generator and dynamic blocks.
Featured Images: pick posts and filters Pro 8 items #
The top of the Featured Images dialog, where you find and select the posts, pages or products to process in one batch.
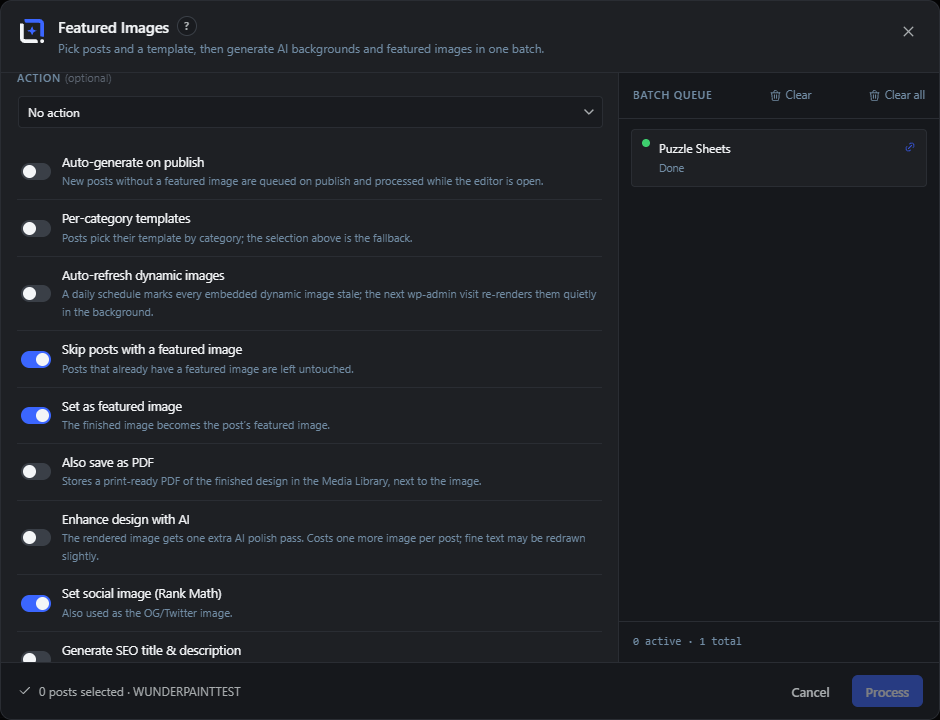
Featured Images (also called Automate Posts) runs a whole batch of posts through a dynamic template, generating a background and a finished featured image for each one. This part of the dialog is about choosing which content to process.
Selection survives reloads: the batch runs in your open editor tab, but per-post progress is stored on the server, so closing or reloading the editor never loses a run.
Search posts…
#Type to filter the list below by post title. The search is debounced, so results update shortly after you stop typing.
Post type
#Dropdown that switches which content type you are working on, for example post, page or WooCommerce product. It only appears when your site has more than one usable type. Switching type clears the current selection.
Tip. Choosing Product turns off the default skip filter, since products almost always already have a main image.
All categories
#Category filter for blog posts. Pick a category to narrow the list; each option shows its post count in parentheses. Only shown when the post type is Post.
Posts
#The scrollable list of matching items. Each row shows a thumbnail, title, date and first category, plus chips for its state. Click a row to select or deselect it.
Select all / Select none
#Toggles the selection of every currently visible row at once. The label flips to Select none once all visible rows are selected.
Tip. It only affects rows already loaded; use Load more first to pull in more posts.
Generated (chip)
#A marker on a post row meaning this post already received an image from a previous automation run. It is informational and does not block re-processing.
Featured (chip)
#A marker on a post row meaning the post already has a featured image set. When the skip filter is on, these rows are left untouched during a run.
Load more
#Loads the next page of posts and appends them to the list. Shown only when more results are available.
Tip. Newly loaded rows are not auto-selected, even if Select all was used earlier.
Featured Images: template, AI background, brand and model ProAI 10 items #
The design controls that decide how each generated featured image looks: the dynamic template, the AI background prompt, the brand kit, the image model and an optional saved Action.
A dynamic template is a design whose layers are bound to post data (title, date, price and so on). During a run each post's data fills those bindings, and if the template has an AI background slot, a fresh background is generated from your prompt.
The image model and brand kit are only relevant when a template actually requests an AI background. Templates without an AI background slot still work with no image provider configured.
Dynamic Template
#A grid of template tiles; click one to use it for the batch. The chosen template is also saved as the fallback used by auto-generation on publish. Tiles are filtered to the selected brand kit's templates plus unassigned ones.
Tip. If the tile you pick has no dynamic (bound) layers, every post gets the same image; bind layers via Properties, Dynamic content first.
AI Background (optional)
#Generates the background through your AI provider. The prompt is user-first: your style directive leads verbatim, brand kit colors join as a color-mood line, and post specifics (title, excerpt, category) are only added when 'Send post context' is enabled. No hidden boilerplate sentences are appended. The bound layer's optional Reference field (set in the editor's properties panel) names a custom image field - every post's background is then re-imagined from its own image; the uploaded reference stays as the ad-hoc alternative.
Style button
#A compact helper next to the AI Background box that inserts ready-made background style phrases into the prompt, so you do not have to write the look from scratch.
Tip. Comes from the editor's shared style presets.
Variable button
#Inserts dynamic variables (for example brand or post tokens like {{post.title}}) into the AI Background prompt, so the generated look can reference the current post or brand kit.
Reference
#Uploads an example image; every background is then re-imagined from that image's look toward the post's content. Once set, a thumbnail with a small remove (×) button appears in its place.
Tip. Use the × button to clear the reference image.
Send post context
#Opt-in: adds the post's title, excerpt and category to the AI background prompt. Off by default so explicit style directives stay in charge; the setting persists and also applies to auto-generation on publish.
Brand Kit
#Selects which brand kit steers the run: its colors and fonts guide the AI background, and its variables fill brand bindings in the template. Includes a No Brand Kit option. Only shown when at least one non-empty brand kit exists.
Tip. The pencil button opens the Brand Kits editor.
Edit Brand Kits (pencil)
#Opens the in-editor Brand Kits dialog so you can add or change kits without leaving Featured Images. The kit list refreshes automatically after you save.
Model
#Chips that pick which configured image provider renders the AI backgrounds. Only appears when at least one image provider (API key) is set up. The active provider is highlighted.
Action (optional)
#Replays a saved editor Action (effects, filters, adjustments, resize) on every finished image, for example a black-and-white look. Choose No action to skip. Only listed when you have saved Actions.
Featured Images: processing options Pro 11 items #
The on/off switches that control what happens to each post during a Featured Images run, plus the per-category template mapping.
These toggles decide the finishing steps and where the result lands. Some appear only when the relevant tool is available, for example the PDF option needs a PDF exporter, and the SEO toggles need an active SEO plugin. The site-wide ones - auto-generate on publish, per-category templates, auto-refresh and the category mapping - are settings for the whole site and need an account that can manage options; everyone else sees the run options only.
Auto-generate on publish
#When on, newly published posts that have no featured image are queued automatically and processed while the editor is open. Uses the category mapping if enabled, otherwise the saved default template. Blog posts only.
Tip. Processing still happens in an open editor tab; the publish hook only queues the job.
Auto-refresh dynamic images
#The lazy scheduler: a daily schedule marks every embedded dynamic image stale, and the next wp-admin visit re-renders them quietly in the background. Graphics built on live data (for example a Dynamic Showcases products grid) stay current wherever they are embedded, with no server-side rendering required.
Per-category templates
#When on, each post chooses its template based on its category, and the template selected above becomes the fallback. Reveals the per-category mapping list. Blog posts only.
Skip posts with a featured image
#When on, any selected post that already has a featured image is left untouched and reported as skipped. Defaults on for posts and pages, off for products.
Set as featured image
#When on, the finished image becomes the post's featured image. Set server-side, so it works for every post type, not just blog posts.
Also save as PDF
#Stores a print-ready PDF of each finished design in the Media Library, next to the image. Only shown when a PDF exporter is available.
Enhance design with AI
#Gives each rendered image one extra AI polish pass. Costs one more generated image per post, and fine text may be redrawn slightly. Only shown when an image provider is configured.
Set social image
#Also sets the finished image as the OG/Twitter social image via the active SEO plugin (Yoast SEO and/or Rank Math). The toggle label names the detected plugin(s). Only shown when an SEO plugin is active.
Generate SEO title & description
#Writes an SEO title and meta description for each post, in the post's own language, and stores them in the active SEO plugin's fields. Only shown when an SEO plugin and a text-capable AI provider are both present.
Per-category template mapping
#The list revealed by Per-category templates: one dropdown per category, each choosing that category's template or Default (the fallback). Changes are saved as you make them.
Webhook after every bake
#An optional URL (Zapier, Make, any endpoint) that receives a JSON POST after every finished dynamic-image bake: post, instance, attachment id and the fresh image URL. The bridge for publish-after-bake automations.
Featured Images: WooCommerce products Pro 3 items #
Extra options that appear when the post type is Product: process the whole product gallery and append a generated infographic.
When you switch the post type to Product, Featured Images can go beyond the main image and rework the entire WooCommerce gallery, then optionally add an AI infographic built from the product's own data.
Process gallery images
#When on, every image in the WooCommerce product gallery is run through the same enhance/action finishing and the gallery template below, then the product gallery is replaced with the results. Products only.
Append product infographic
#Generates one AI infographic from the product's name, price, short description and rating, and adds it to the end of the gallery. Products only, and only when an image provider is configured.
Gallery template
#Chooses how each gallery image is treated. Options are No template (finishing only) to keep it as a photo, Same template as the main image, or any specific dynamic template (placed via its Product image binding). Shown only when Process gallery images is on.
Featured Images: batch queue and run controls Pro 11 items #
The right-hand queue panel and the footer buttons that start, stop, resume and monitor a Featured Images batch.
Because progress is stored on the server, a run is resumable. If you reopen the dialog with unfinished jobs, you can pick up where you left off, retry failed ones, and clear finished cards.
Batch Queue
#The live list of jobs, newest first. Each card shows the post title, a colored status dot and the current status text, with a link to the finished image or a Retry button as appropriate.
Job status labels
#The per-job status shown on each queue card as it advances through the pipeline. Failed jobs also show the error text.
Clear
#Removes all finished job cards (done, failed and skipped) from the queue. Only appears when at least one finished job exists. Unfinished jobs are kept.
Clear all
#Removes every job you may manage from the queue, including queued and unfinished ones - a running batch stops first. Two-step button: the first click arms it, the second clears.
Resume N unfinished
#Restarts processing of the jobs that are still queued or mid-pipeline, for example after a reload. Only appears when unfinished jobs exist and nothing is currently running.
Tip. This is how a batch survives closing the editor: reopen and press Resume.
Retry
#Re-runs a single failed job from the start, clearing its previous error. Only shown on failed cards while no batch is running.
Open image (link)
#On a finished job, opens the generated image in a new tab. Shown only when the job is done and has a result URL.
Process N posts
#The main action: queues the selected posts (minus any skipped ones) and starts the batch immediately. Disabled until at least one post and a template are chosen. The label shows the selected count.
Stop after current post
#Replaces the Process button while a batch runs. It lets the current post finish, then halts the queue so nothing is left half-done.
Cancel
#Closes the dialog without starting a new run. Queued and finished jobs remain on the server and can be resumed later.
Selection summary
#The footer readout showing how many posts are selected and which template will be used, plus an N active · N total count in the queue foot.
Featured Images: warnings, option values and states Pro 15 items #
The empty option values, warning banners and state messages in the Featured Images batch dialog that the main control list does not cover.
These items appear inside dropdowns, as inline warning banners above the post list, or as small status texts. They round out the documentation of the Featured Images dialog (automate-dialog.jsx).
No Brand Kit
#The last option in the Brand Kit dropdown. Picks no kit, so the AI background is not steered by brand colors or fonts and any brand variable bindings stay empty.
No action
#The default option in the optional Action dropdown. Leaves the finished image exactly as rendered, without replaying a saved editor action on it.
No template (finishing only)
#A Gallery template option (products only). Each WooCommerce gallery image only receives the enhance and action finishing, it is not placed into a dynamic template.
Tip. Only shown when Process gallery images is on.
Same template as the main image
#A Gallery template option. Every gallery image runs through the same dynamic template you chose for the featured image, filled through its Product image binding.
Default (per-category row)
#The first option in each row of the per-category template mapping. Leaves that category on the fallback template selected above instead of assigning it a specific one.
Remove reference image
#The small × on the uploaded reference thumbnail. Clears the reference so backgrounds are generated from the text prompt alone.
No image provider is configured (warning)
#A banner shown when no image API key is set. AI backgrounds are unavailable, but templates that have no AI background slot still work. Add a key in Settings.
This template has no dynamic layers yet (warning)
#A banner shown when the chosen template has no bound layers, so every post would get the same image. Bind layers via Properties, Dynamic content.
This template uses an AI background, but no image provider is configured (warning)
#A banner shown when the selected template needs an AI-generated background but no image provider is available.
%1$d active · %2$d total
#The footer counter under the Batch Queue. Shows how many jobs are still unfinished and the total number of jobs stored.
Nothing processed yet. Select posts and press Process.
#The empty state of the Batch Queue before any run has started.
(no title)
#Placeholder shown in the post list for a post that has no title yet.
Loading… / No posts found.
#The post list states: Loading… while a search runs, and No posts found. when the search and filter match nothing.
All selected posts already have a featured image.
#An error toast raised when every picked post is removed by the skip filter, so there is nothing to process.
%d posts skipped (already have a featured image).
#A success note after queueing that reports how many posts the skip filter left untouched.
Batch Queue: job status labels Pro 12 items #
The per-job status text on each card in the Batch Queue as a post moves through the pipeline.
Each queued post shows a colored dot and one of these status texts. They advance in order as the browser processes the job, and closing the editor never loses them (the job store is server-side).
Queued
#The job is waiting in line and has not started yet.
Generating background…
#The AI image background for this post is being generated.
Rendering…
#The dynamic template is being filled with the post data and rendered to an image.
Enhancing design…
#The optional extra AI polish pass is running on the rendered image.
Applying action…
#A saved editor action (effects, filters, adjustments, resize) is being replayed on the finished image.
Processing gallery…
#The product's WooCommerce gallery images are being processed and rebuilt.
Generating infographic…
#An AI infographic from the product data is being created and appended to the gallery.
Saving…
#The finished image is being written to the Media Library and set as the featured image.
Saving PDF…
#A print-ready PDF of the design is being stored next to the image.
Done
#The post finished successfully. An Open image link appears on the card.
Failed
#The job hit an error (the message is appended). A Retry button appears when nothing is running.
Skipped
#The post was skipped, for example because it already had a featured image and the skip filter was on.
Image Processor (Batch Process) Pro 15 items #
Re-encode, resize, convert, optimize and optionally run an Action over many Media Library images in one pass, right in your browser.
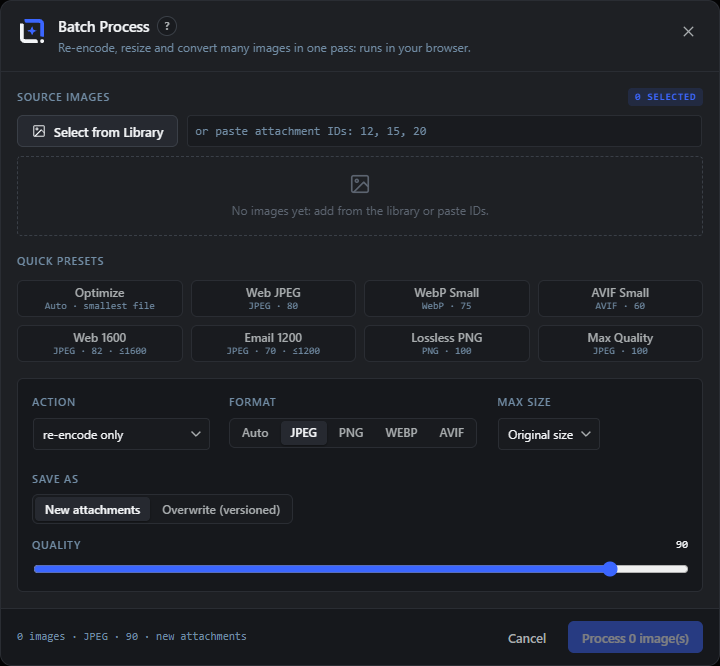
The Batch Process dialog takes a set of attachment ids, applies an optional saved Action plus export settings, and writes the results either as new attachments or as versioned overwrites. Everything runs client-side through the headless render pipeline, with a live per-image progress list.
Select from Library
#Opens the WordPress media modal to pick images to process; picks are added to the current selection. Only shown when the media modal is available.
Paste attachment IDs
#A text field to type or paste attachment ids directly, separated by spaces, commas or semicolons. Used when you already know the ids or the media modal is unavailable.
Tip. Duplicate and non-positive ids are ignored automatically.
Quick Presets
#Eight compact one-tap cards that set format, quality and max size together. The active card is highlighted when the current settings match it.
Action
#Chooses a saved editor Action to run on every image before export, or re-encode only to just convert and compress without edits.
Format
#A five-way switch for the output encoding. Auto is the Optimize mode (smallest file with no visible difference); AVIF is encoded by the bundled WASM codec.
Save As
#Chooses where results go: New attachments creates fresh Media Library entries, or Overwrite (versioned) replaces the originals while keeping a version history.
Quality
#Slider for the output compression quality. Higher means larger, cleaner files. Ignored for lossless PNG in practice.
Watermark
#When ticked, applies your configured watermark to each processed image. Only shown when a watermark is set up in the editor.
Process N image(s)
#Starts the batch and shows a live list where each row reports pending, working, done (with a link) or error. Disabled while running or when nothing is selected; the label reflects the image count.
Cancel
#Closes the dialog. Disabled while a batch is running so you do not interrupt it mid-pass.
Tip. Pressing Escape also closes the dialog, but only when nothing is running.
Optimize (Auto format)
#The Auto format re-encodes each image at the lowest quality that still looks identical (a perceptual SSIM search), preferring WebP with JPEG fallback. When overwriting, an image is only replaced for a meaningful saving (at least 5% or 10 KB); otherwise it reports already optimal, which also protects against quality loss from repeated runs.
Max Size
#Downscales every image so its long side stays within the chosen limit before encoding; Original size keeps dimensions. Works with every format. A real downscale always saves, even when the byte saving alone would be marginal.
WASM codecs
#Bundled WebAssembly encoders (MozJPEG, WebP, AVIF) plus a lossless OxiPNG pass take over encoding when available: better compression than the browser's native encoders, WebP output even on Safari, and AVIF output at all. Loaded lazily on the first run; the native encoders remain as automatic fallback.
Results
#A scrollable section that lists every processed image with its title, new file size, format, dimensions, the saving in green, and an open link to the saved file. Skipped images show already optimal, failures show the error message.
Selection grid
#Selected images show as cards with their real Media Library thumbnail and title (plus id), so you can verify the batch before running it. Up to eight cards are shown, the rest is summarized as +N.
Batch Process: preset cards, options and states Pro 21 items #
The quick preset cards, dropdown and segmented options, and progress states inside the Batch Process (Image Processor) dialog.
The Batch Process dialog (batch-dialog.jsx, opened as Image Processor) re-encodes, resizes and converts many library images in one browser-side pass. These are the option values and states the main list did not name.
Optimize
#The first Quick Preset card. Sets the format to Auto: smallest file with no visible difference (perceptual auto quality, WebP preferred).
Web JPEG
#A one-tap Quick Preset card. Sets the format to JPEG at quality 80, a good default for web photos.
Lossless PNG
#A Quick Preset card. Sets the format to PNG at quality 100 for a lossless result.
WebP Small
#A Quick Preset card. Sets the format to WebP at quality 75 for small file sizes.
Max Quality
#A Quick Preset card. Sets the format to JPEG at quality 100 for the highest-quality JPEG.
re-encode only
#The default option of the Action dropdown. Applies no saved action, so images are only re-encoded and resized to the chosen format and quality.
Format (Auto / JPEG / PNG / WebP / AVIF)
#A segmented control for the output file type of the batch. Auto runs the Optimize mode; AVIF needs the bundled WASM codec (loaded automatically).
New attachments
#The Save As option that saves every result as a brand-new Media Library attachment, leaving the originals in place.
Overwrite (versioned)
#The Save As option that overwrites each source image in place, keeping a version so you can roll back.
Source Images / %d selected
#The section header for the image list and its live count of how many attachments are queued (from library picks plus pasted IDs).
Remove (source image)
#The × on a picked image tile. Drops that attachment from the batch (available only for library-picked images, not pasted IDs).
No images yet: add from the library or paste IDs.
#The empty state shown before any source image has been added.
Progress rows (…, spinner, done, error)
#The live per-image progress list. … means pending, a spinner means working, done is a link to the result, and errors show in red.
Processing…
#The label on the primary button while the batch runs, replacing Process N image(s) and showing a spinner.
Batch finished: %1$d processed, %2$d failed.
#The summary toast after a run, reporting how many images succeeded and how many failed.
Footer summary line
#The footer text that previews the batch: image count, format and quality, and whether results become new attachments or overwrite (versioned).
AVIF Small
#A Quick Preset card. Sets the format to AVIF at quality 60: the most modern codec with the smallest files for photos.
Web 1600
#A Quick Preset card for content images: JPEG at quality 82, downscaled to at most 1600 px on the long side.
Email 1200
#A Quick Preset card for images that travel by mail or newsletter: JPEG at quality 70, at most 1200 px on the long side.
already optimal
#The per-image state in Optimize mode when overwriting would not save at least 5% or 10 KB. The original file is kept untouched and the summary toast counts these images separately.
open (result link)
#Each finished row in the Results list links to the saved file in a new tab, so you can inspect the output immediately.
Series from CSV (Generate from CSV) Pro 11 items #
Turn the current document into a template and generate one Media Library image per CSV row by filling in {{placeholder}} text.
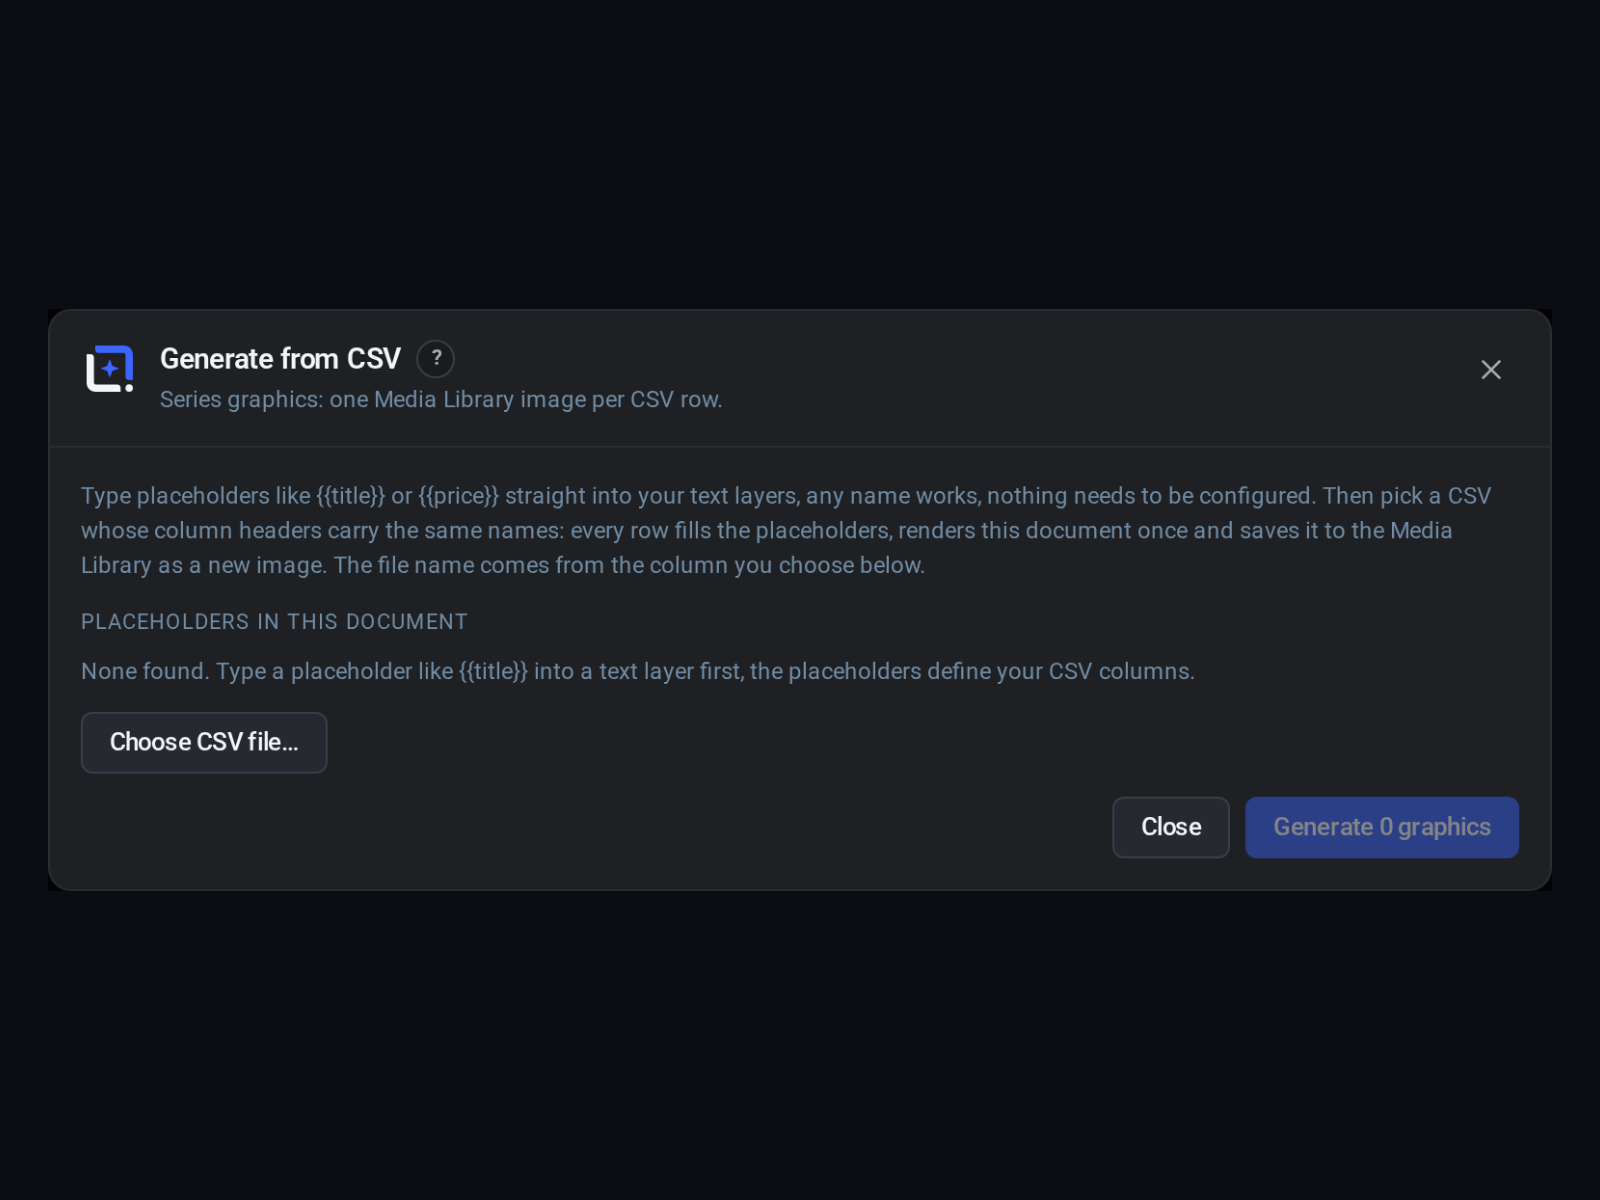
Generate from CSV treats your open document as a template. Any {{key}} written into a text layer is a placeholder; upload a CSV whose column headers match those keys, and each row renders the document once and saves it as a new image.
Nothing needs to be pre-configured: the placeholders you type define the columns the CSV should have. The file name for each image comes from a column you choose.
Placeholders in this document
#A read-only list of the {{key}} tokens detected in the document's text layers. These define the columns your CSV should carry. If none are found, the dialog explains to add one like {{title}} first.
Tip. Type placeholders directly into text layers; any name works.
Your CSV should look like this
#A preview block showing an example CSV matching the current placeholders: a filename column plus one column per placeholder. Shown before a CSV is loaded.
Download sample CSV
#Downloads a ready-made wpie-series.csv with the correct headers and two example rows, so you can fill it in instead of building the file by hand.
Choose CSV file…
#Opens a file picker for a .csv file. After loading, the file name and row count show, and the CSV's headers appear as chips marked used or unused against your placeholders.
Header chips (used / unused)
#Each CSV column header is shown as a chip. A used chip matches a placeholder in the document; an unused chip is a column that will not be applied.
Missing in CSV
#A warning listing any document placeholders that have no matching CSV column. Those placeholders stay empty in the output rather than blocking the run.
File name from column
#Chooses which CSV column supplies each generated image's file name. Defaults to the first column. Names are cleaned to safe characters, with a fallback like image-1 if empty.
Format
#The output image format for every generated row.
Quality
#A number field for compression quality of the generated images. Values are clamped to the valid range.
Generate N graphics
#Renders one image per CSV row and saves each as a new Media Library attachment, showing a live progress list with per-row done links or errors. Disabled until a CSV with rows and at least one placeholder are present.
Cancel / Close
#While running, a Cancel button stops after the current row; otherwise a Close button dismisses the dialog. Escape also closes it when idle.
Generate from CSV: options and states Pro 6 items #
The export options, empty states and progress messages in the Series from CSV dialog.
The Generate from CSV dialog (merge-dialog.jsx) fills {{key}} placeholders in the current document from each CSV row and saves one Media Library image per row. These are the smaller controls and states not yet listed.
Format (PNG / JPEG / WebP)
#The output file type for every generated image. Note the default here is PNG, unlike the Batch Process dialog.
Quality (CSV series)
#A number field for the export quality of each generated image. Values outside the range are clamped.
None found. (no placeholders)
#The message shown when the document has no {{placeholder}} text yet. Type one like {{title}} into a text layer first; the placeholders define your CSV columns.
Progress rows (CSV)
#The live per-row list. … is pending, a spinner is working, done links to the saved image, and errors show in red. Rows are labeled by the name column value.
%d rows (CSV summary)
#After a CSV is chosen, the file name and its row count are shown next to the Choose CSV file button.
%d graphics generated.
#The success toast after a run, reporting how many images were saved to the Media Library.
Generate Content (AI content generator) ProAI 16 items #
Produce a complete WordPress draft in one pass: article text plus featured image, OG image, body images and an infographic, all in your brand.
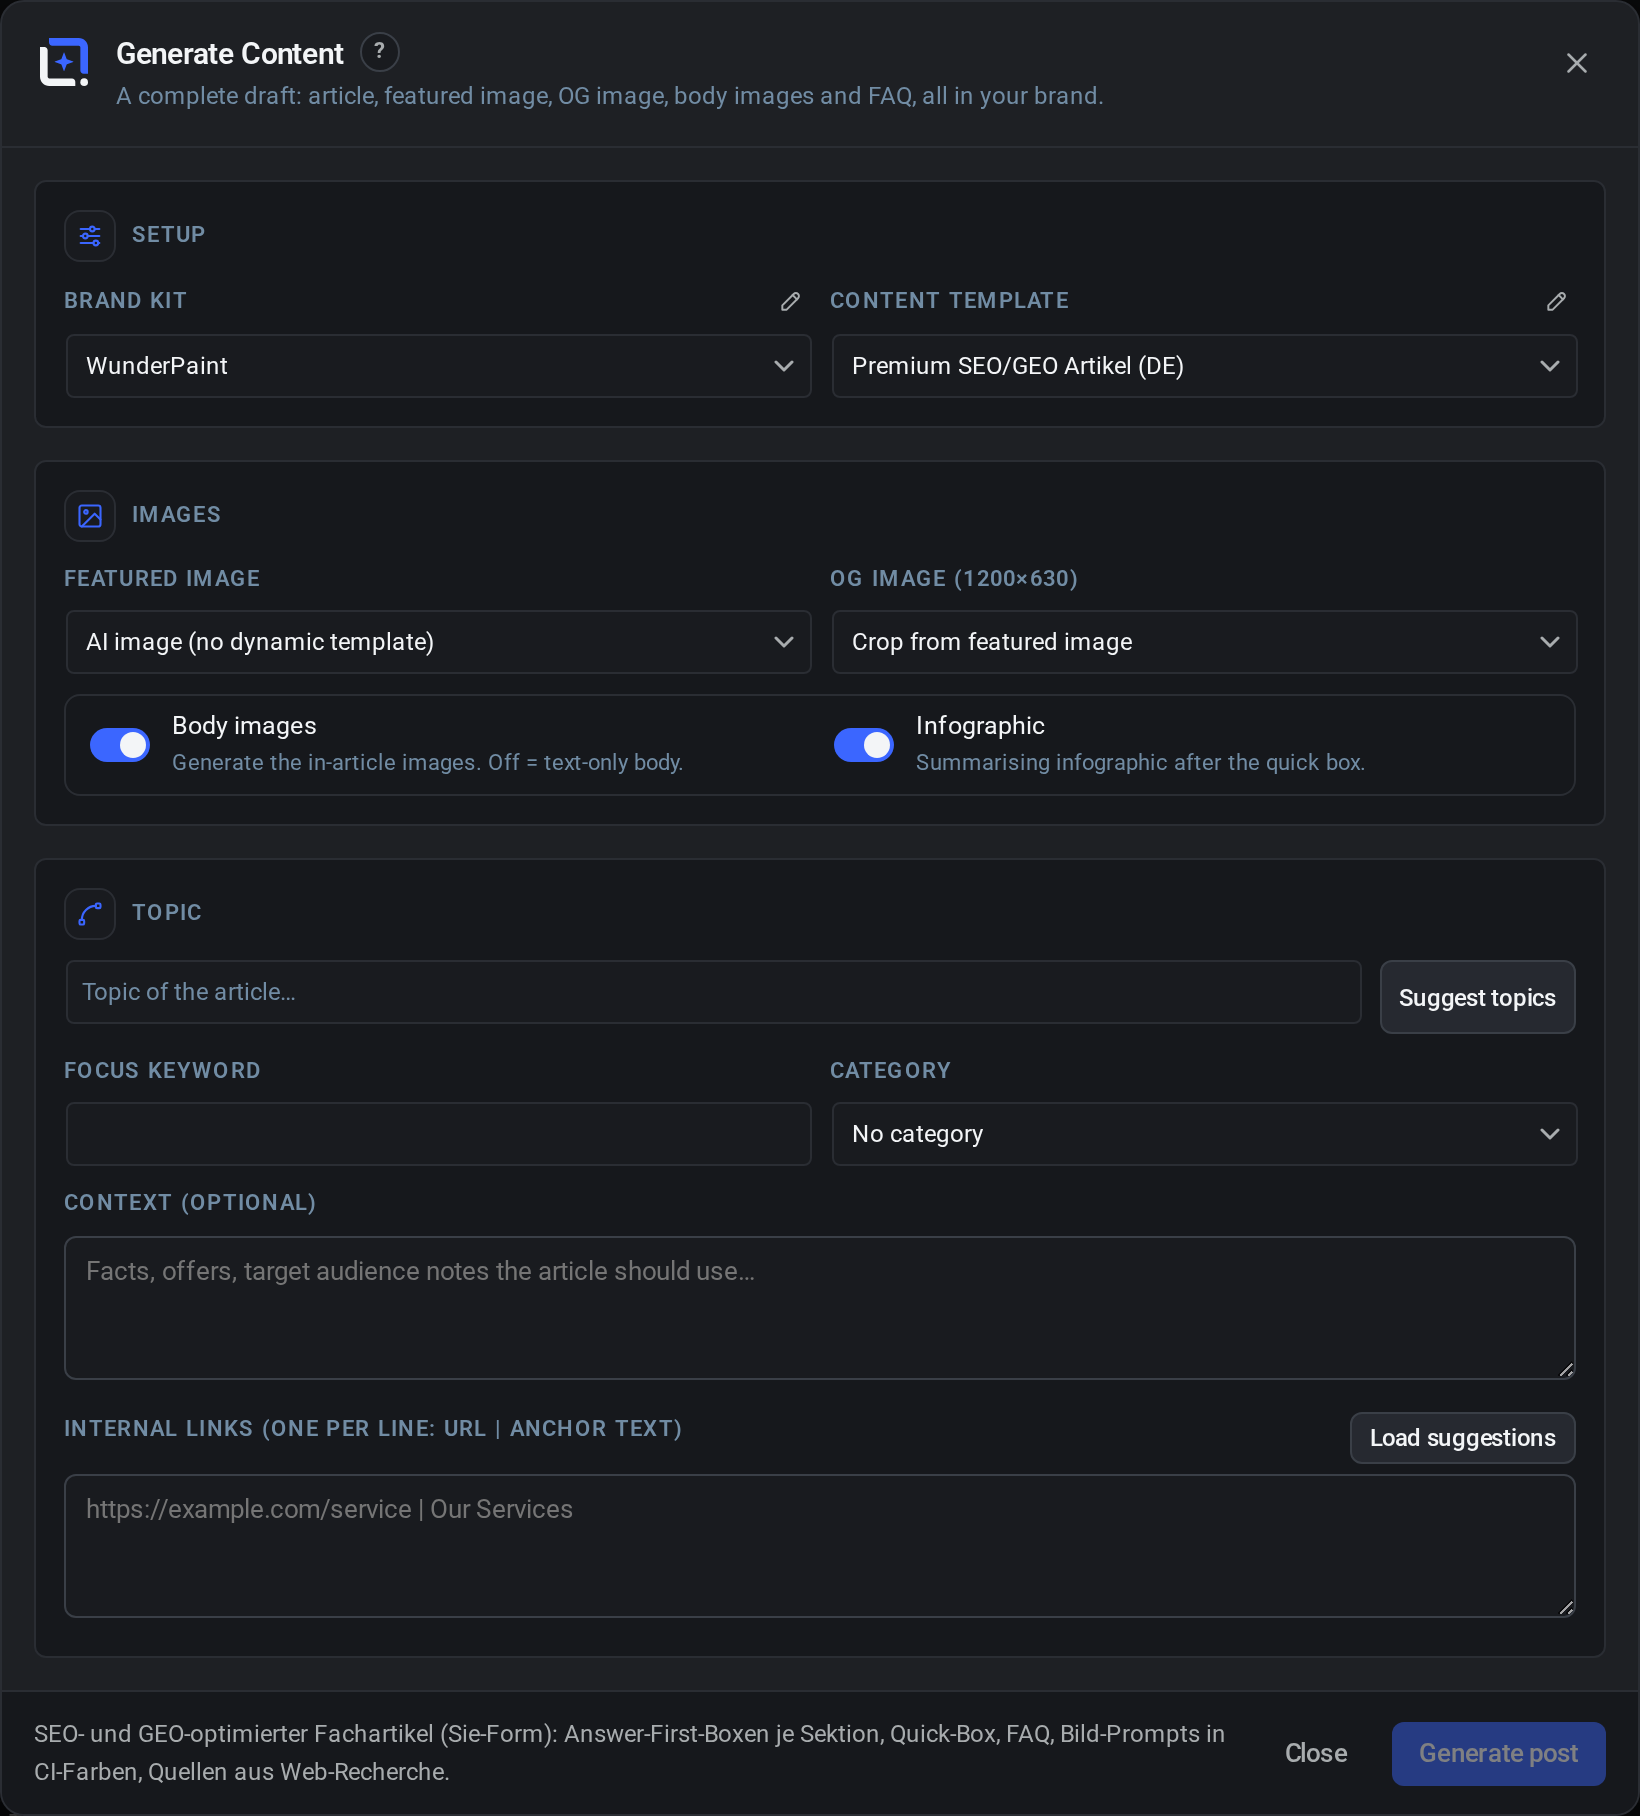
Generate Content ties the content template, brand kit and a dynamic design template together. You describe the assignment (topic, keyword, context, internal links) and the pipeline writes the article, renders every image in your brand, and files a WordPress draft with SEO meta.
It needs a text-capable AI provider (Anthropic, OpenAI or Gemini). Without an image provider it still creates the draft, but without images.
Brand Kit
#Selects the brand kit whose profile, colors, fonts and variables steer the article tone and the generated images. A pencil button opens the Brand Kits editor. Defaults to the first kit.
Content template
#Chooses which reusable content recipe (model setup, prompts, output rules) writes the article. Managed in the Content Templates dialog.
Dynamic template (featured image)
#Chooses the design template used to render the featured image. Pick AI image (no dynamic template) to generate a plain AI image instead. Templates are grouped by the selected brand kit and a Without Brand Kit group.
Action
#Replays a saved editor Action on the rendered featured image, for example a black-and-white look. Choose No action to skip. Appears only when a dynamic template is selected and you have saved Actions.
Enhance design
#Gives the rendered featured image one extra AI polish pass. Costs one more generated image, and fine text may be redrawn slightly. Shown when a dynamic template is chosen and an image provider is configured.
Topic
#The free-text subject of the article, for example How to winterize a garden pond. Required before you can generate.
Suggest topics
#Asks the AI for three topic ideas drawn from your brand profile and category, each with a focus keyword and a short rationale. Clicking an idea fills the topic and keyword fields. Needs a text provider.
Focus keyword
#The main SEO keyword for the article. Used to steer the writing and written into the SEO plugin's focus keyword field on the draft.
Category
#Assigns the resulting draft to a WordPress category. Choose No category to leave it unassigned.
Context (optional)
#A free-text box for facts, offers or target-audience notes the article should use. Helps ground the writing in your specifics.
Internal links
#One link per line as URL | anchor text; the article weaves these into the body. Up to 20 links are used.
Load suggestions
#Searches your posts and pages for the best internal-link targets matching the focus keyword or topic (service pages are prioritized) and lists them as toggleable rows that add or remove lines in the links box.
Progress (generation steps)
#A progress bar plus step chips that light up as the pipeline runs. The steps are the full set of outputs produced for the draft. A header shows elapsed time and percent complete.
Open draft in WordPress
#After a successful run, links straight to the newly created draft's editor. The panel also reports the draft's post id and any non-fatal image failures.
Generate post
#Starts the whole pipeline. Disabled until a text provider, a content template and a topic are all present. The label changes to Generating… while it runs.
Cancel / Close
#While a run is live, Cancel signals the pipeline to stop; otherwise Close dismisses the dialog. Escape does not close mid-run.
Content Templates ProAI 19 items #
Manage the reusable AI article recipes used by Generate Content: model setup, prompts and output rules.
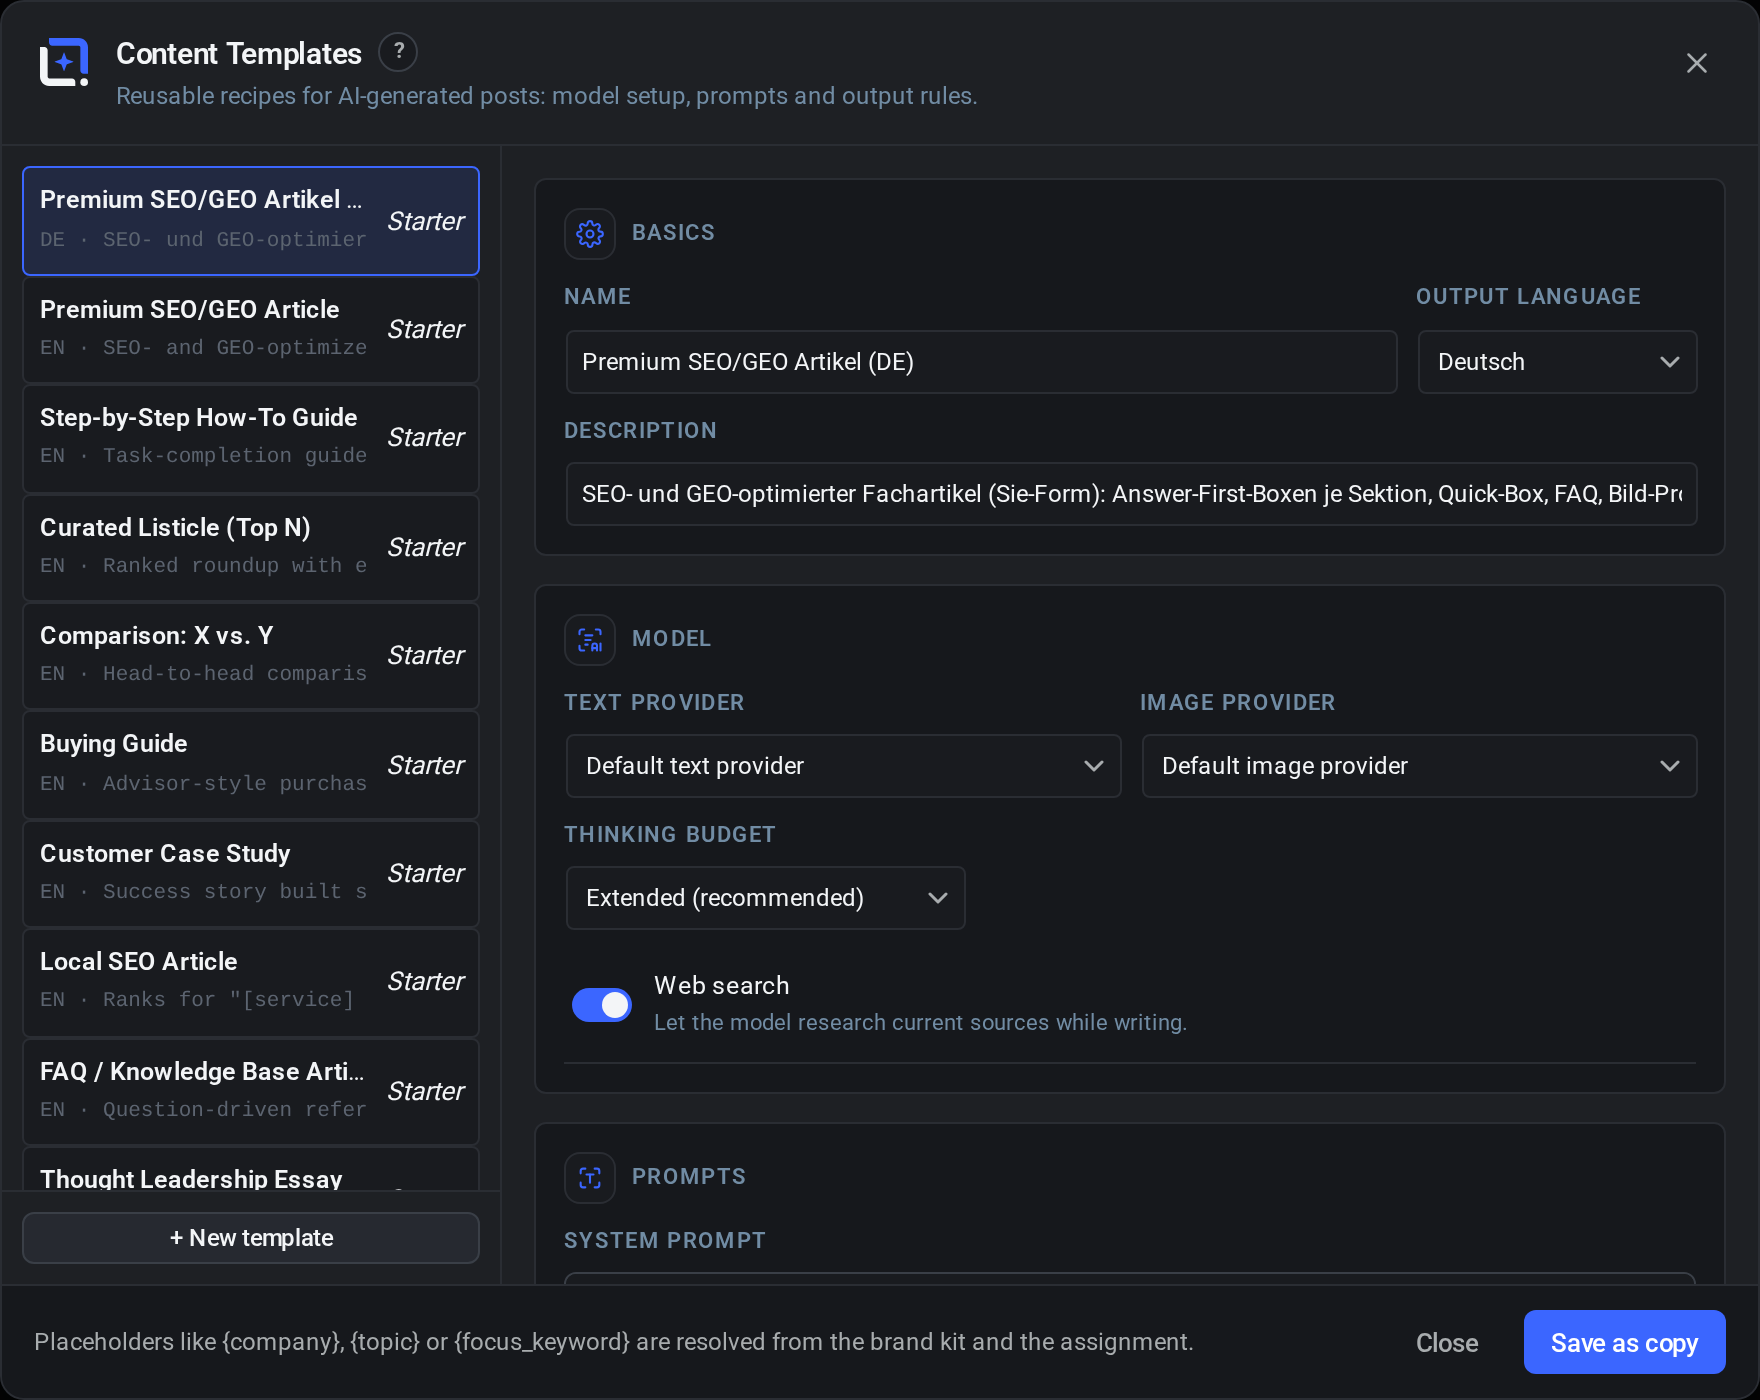
Each content template is a saved recipe of how an article is written and which images accompany it. The left column lists starter templates and your own; the right side is the form. Starters are read-only, so saving an edited starter creates an editable copy.
Prompt placeholders like {company}, {topic} or {focus_keyword} are resolved from the brand kit and the assignment at generation time.
Template list
#The left column of saved templates. Each row shows the name, language and description; built-in ones carry a Starter chip. Click to load one into the form.
+ New template
#Clears the form to a blank template so you can build one from scratch.
Tip. Blank defaults: German language, Normal thinking, web search on, 3 body images, 1200 min words.
Name
#The template's display name, shown in the list and in the Generate Content picker. Required to save.
Output language
#The language the finished article is written in, regardless of the language of the prompts. The server injects an explicit output-language instruction from this setting.
Description
#A short note about what this template is for. Shown under the name in the list and as a hint in Generate Content.
Text provider
#Which AI text model writes the article. Choose Default text provider to use the editor's global default, or pin a specific one.
Image provider
#Which AI image model renders the images. Choose Default image provider or pin a specific one.
Thinking budget
#How much internal reasoning the text model spends before writing. More thinking generally means a stronger article at higher cost.
Web search
#When on, lets the model research current sources while writing the article.
System prompt
#The large instruction block that defines the writer's role, tone and rules. This is the core of the recipe and can reference placeholders like {company} and {topic}.
Image prompt (style template for all images)
#A shared style description applied to every image the pipeline generates, so body images, featured and OG all look consistent. A Style button inserts ready-made style phrases.
Output directives
#Extra rules appended to the generation, for example structural or formatting requirements the article must follow.
Body images
#How many in-article body images the pipeline generates. Set 0 for a text-only article.
Body aspect
#The aspect ratio for the body images.
Featured aspect
#The aspect ratio for the featured image (and typically the OG image).
Min. words
#A minimum word count target for the generated article body.
Infographic
#When on, adds a summarizing infographic after the quick box in the article.
Save button
#Saves the template. The label is Create template for a new one, Save for an existing user template, and Save as copy when editing a starter (which creates an editable copy rather than changing the starter). Disabled until a name is entered.
Delete
#Deletes the current user template after a confirmation click (Really delete?). Not available for starter templates.
Content Templates: option lists, defaults and states Pro 11 items #
The dropdown option values, section headers, default values and button states in the Content Templates editor.
The Content Templates dialog (content-templates-dialog.jsx) manages the reusable AI article recipes. These are the option lists and defaults behind its controls, plus its section headers and save/delete states.
Text provider options
#The provider choices for the article text model. Default text provider uses the site default; the rest force a specific vendor.
Image provider options
#The provider choices for the image model. Default image provider uses the site default.
Thinking budget options
#How much reasoning the text model spends while writing. Off is fastest, Extended (recommended) gives the most thorough article.
Output language options
#The language the finished article is written in. The prompt texts can stay in any language; the server injects an explicit output-language instruction from this setting.
Body aspect / Featured aspect options
#The aspect ratios offered for the body images and the featured image dropdowns.
Output field ranges and defaults
#Numeric limits for the output fields: Body images accepts 0 to 10 (default 3) and Min. words accepts 0 to 20000 (default 1200). A blank template also starts with Web search on, Deep research off, and Infographic on.
Starter (chip)
#A chip on read-only starter templates in the list. Editing and saving a starter creates your own user copy instead of changing the starter.
Save as copy / Create template / Save
#The primary button changes with context: Save as copy for a starter, Create template for a new one, and Save when updating an existing user template.
Really delete?
#The Delete button asks for a second click, turning into Really delete? before it removes a user template. Starters cannot be deleted.
Settings / Prompts / Output (section headers)
#The three grouping headers inside the form. Settings holds the thinking budget and research toggles, Prompts holds the system, image and directive prompts, and Output holds the image counts, aspects and word count.
Placeholders like {company}, {topic} or {focus_keyword}
#The footer hint. Tokens like {company}, {topic} and {focus_keyword} written into the prompts are resolved from the brand kit and the current assignment.
Generate Content: steps, option values and states Pro 21 items #
The pipeline step labels, dropdown option values, suggestion lists and progress states in the Generate Content dialog.
The Generate Content dialog (create-post-dialog.jsx) writes a full draft in one run. These are the individual progress steps, empty option values, suggestion pickers and progress states not covered by the main control list.
Write article
#The first pipeline step. The AI writes the full structured article from the topic, keyword and context.
Body images
#Pipeline step that generates the in-article images (count and aspect come from the content template).
Featured image
#Pipeline step that produces the post's featured image, either from a dynamic template or as a plain AI image.
Social/OG image
#Pipeline step that renders the Open Graph and Twitter share image.
Infographic
#Pipeline step that builds the summarising infographic (when the content template has it enabled).
Create draft
#The final step. Assembles the article and all images into a WordPress draft with SEO meta, tags and category.
AI image (no dynamic template)
#The default option of the Dynamic template (featured image) dropdown. The featured image is generated as a plain AI image instead of being composed from a template.
Without Brand Kit (option group)
#An option group in the dynamic-template dropdown holding templates that are not tied to any brand kit, shown below the selected kit's own templates.
No Brand Kit
#The placeholder option shown in the Brand Kit dropdown when no brand kits exist yet.
No category
#The default option of the Category dropdown. Leaves the draft uncategorised.
No action
#The default option of the optional Action dropdown (shown when a dynamic template is chosen). Leaves the rendered featured image without a replayed editor action.
Topic idea rows
#After Suggest topics, up to three clickable idea rows appear, each with a topic, focus keyword and a short rationale. Clicking one fills the Topic and Focus keyword fields.
Internal-link suggestion rows
#After Load suggestions, matching posts and pages appear as toggle rows; selecting one adds a URL | anchor line to the internal links box. Deselecting removes it.
Internal links (one per line: URL | anchor text)
#The label and format for the internal links box. Put one link per line as the URL, then a pipe, then the anchor text.
No matching posts found.
#Shown under the internal links box when Load suggestions returns nothing for the keyword or topic.
Progress header (Starting… / Step X of Y / Finished / Failed)
#The progress line above the bar. It reads Starting…, then Step X of Y: label…, ending in Finished or Failed, with elapsed time and a percentage on the right.
Draft #%d created.
#The success panel after a run. Reports the new draft's post id and offers an Open draft in WordPress link.
No text-capable AI provider configured (warning)
#A banner shown when no text provider is set. Add an Anthropic, OpenAI or Gemini key in the settings first; without it Generate is disabled.
No image provider configured (warning)
#A banner shown when text works but no image provider is set. The draft is created without any images.
Setup (section header)
#The header for the top row of the dialog holding Brand Kit, Content template and the featured-image dynamic template.
Thinking… / Searching… (loading labels)
#The Suggest topics button shows Thinking… while ideas load, and the Load suggestions button shows Searching… while link candidates load.
Dynamic Template Shortcodes (in-editor dialog) Pro 5 items #
One dialog that bakes and hands out every shortcode the dynamic-image family offers, for use in the Classic editor, Elementor's shortcode widget and any other builder.
Reached from View, Dynamic Template Shortcodes, this dialog explains and produces the three shortcodes so you can use a design outside Gutenberg. The Live Badge is baked from the current design; the Personalized and Dynamic Image shortcodes reference a saved dynamic template by its id.
Personalized and Dynamic Image both require the current design to be saved as a dynamic template first (File, Save as Dynamic Template), because their shortcodes point at the template id.
Bake badge from this design
#Exports the current document as a vector Live Badge SVG and stores it server-side, returning a [wpie_live_badge] shortcode. Updating the design's dynamic template re-bakes the badge automatically; the button (labelled Re-bake badge once a badge exists) covers designs you change without saving to a template, and the shortcode stays the same either way. Vector content (text and shapes) works best; pixel layers embed as static images.
Live Badge copy row
#Shows the baked badge shortcode in a read-only field with a Copy button. Copying confirms with a toast, or tells you to select and copy by hand if the browser blocks clipboard access.
Personalized parameter mapping
#For each named text layer, a parameter field and a fallback text field. The parameter is the URL query key (for example name) that will replace the layer; the fallback shows when the parameter is missing. Parameter input strips characters other than letters, digits, underscore and dash.
Personalized copy row
#Builds and shows the [wpie_personalized] shortcode with the template id and the map string assembled from your parameter/fallback entries, with a Copy button. Requires the design to be a saved dynamic template.
Dynamic Image copy row
#Shows the [wpie_dynamic_image template="…"] shortcode for the current saved template, with a Copy button. Saves mark the baked image stale, and the next open editor session re-bakes it; until the first bake, the template preview shows.
Dynamic-image Gutenberg blocks Pro 9 items #
Three block-editor blocks that place your dynamic templates directly onto pages and posts, each with its own inspector settings.
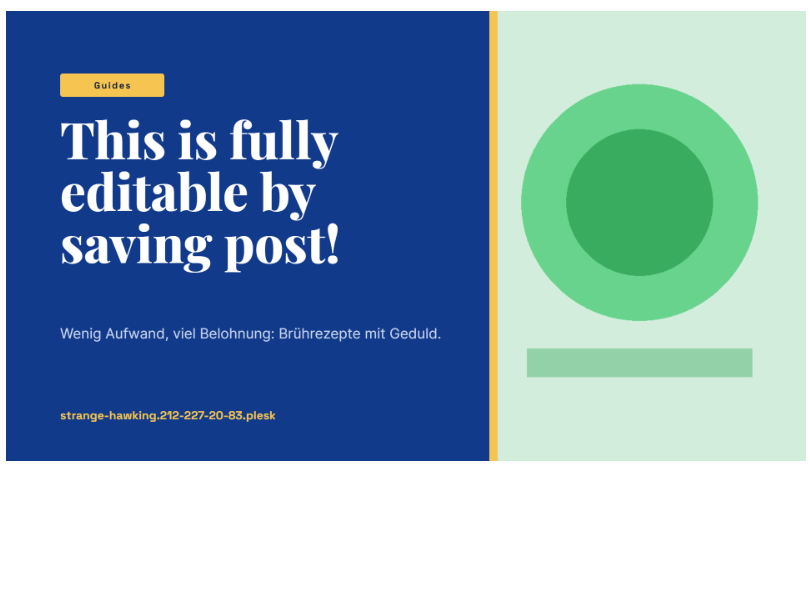
These blocks live in the Media category of the Gutenberg inserter. Dynamic Image bakes a real image on every save; Live Badge is a baked vector whose bound texts the server fills in as the page is served and which re-bakes when its template is updated; Personalized Image renders live in each visitor's browser with URL parameters applied.
Every block shares two inspector controls: a Dynamic template picker and a Width (%) slider. Blocks render server-side on the front end.
Dynamic Image (WPIE)
#A real image baked from a dynamic template filled with this post's data, re-rendered on every save so the front end serves a plain, stable <img>. Add it, pick a template, then save (or press Render now) to bake.
Render now
#Bakes the Dynamic Image block immediately instead of waiting for the next post save. The button shows Rendering… while it works.
Live Badge (WPIE)
#A vector badge whose bound texts are substituted server-side on every page view, so it stays current with no re-render. Pick a template and press Create badge; vector-only designs (text and shapes) work best.
Create badge / Recreate badge
#Exports the chosen template to SVG and stores it as the badge. The label is Create badge the first time and Recreate badge afterward; Creating… shows while it works.
Personalized Image (WPIE)
#Renders a template live in the visitor's browser, replacing mapped text layers with URL parameters, so every visitor can get their own version. Pick a template, then map layers to parameters. The editor preview uses the fallback values.
URL parameters (Parameter / Fallback text)
#A second inspector panel listing each text layer of the chosen template with a Parameter field (the URL query key, letters/digits/underscore/dash only) and a Fallback text field shown when the parameter is absent.
Dynamic template (block picker)
#The shared dropdown in each block's settings that selects which saved dynamic template the block uses. Its first option is Select a template.
Width (%)
#The shared slider controlling how wide the block renders relative to its container. Present in all three blocks.
Background refresh (lazy scheduler)
#Dynamic images re-render on every save of their post, and, with Auto-refresh dynamic images enabled in the Automate dialog, on a daily schedule: while you work anywhere in wp-admin, an invisible background frame re-renders stale images. The embedded image keeps its stable URL and picks up a fresh version stamp, so it updates everywhere it is shown. Every re-bake overwrites the instance's single attachment (the previous file stays as a restorable version) - the media library never fills with copies.
Front-end shortcodes reference Pro 5 items #
The three shortcodes the dynamic-image family registers, with their attributes, for the Classic editor, Elementor's shortcode widget and any other builder.
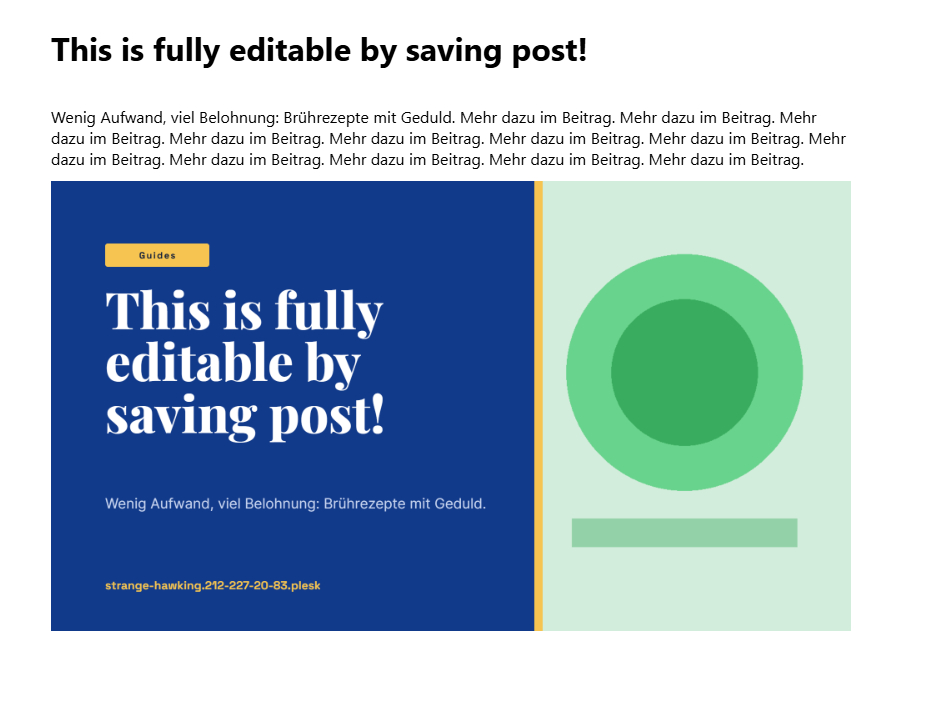
Every dynamic block has a matching shortcode so the same designs work outside Gutenberg. All three accept a width attribute (a percentage, clamped between 10 and 100). Use the in-editor Dynamic Template Shortcodes dialog to generate them with the right ids filled in.
[wpie_dynamic_image]
#Outputs a real, baked image filled with the embedding post's data for the given template. Until the first bake lands, the template preview shows; each post save marks the image stale so the next capable editor session re-bakes it, overwriting the same attachment for a stable URL.
[wpie_live_badge]
#Inlines a stored vector badge SVG, substituting its bound text nodes with the current post's field values on every page render. The SVG is sanitized on save (scripts, links and animation stripped) and uses the page's self-hosted fonts. Because the visitor's browser lays out the SVG text, spacing can differ slightly from the editor preview - by design, in exchange for texts that update on every view.
[wpie_personalized]
#Renders a template live in the visitor's browser with per-visitor URL-parameter substitutions. Post bindings (title, prices) resolve server-side; only the mapped parameters stay dynamic client-side. Visiting ?name=Anna replaces the mapped layer with Anna.
map attribute format
#The map attribute of [wpie_personalized] is a pipe-separated list; each entry is a layer name, a URL parameter and an optional fallback, separated by colons, as in map="Name:name:Guest|City:city".
Newsletter merge tags (personalized images)
#The personalized shortcode reads its values from URL parameters, which makes newsletter personalization a one-liner: link your mailing to the page as ?vorname=*|FNAME|* (Mailchimp) or ?vorname={{contact.FIRSTNAME}} (Brevo) and map the layer with [wpie_personalized template="…" map="Name:vorname:Kaffeefreund"] - the mail tool substitutes its merge tag into the URL, every reader sees the graphic with their own name, and the third mapping part is the fallback for visitors without a parameter.
Dynamic Template Shortcodes: sections and states Pro 8 items #
The three shortcode sections, the copy control, badge states and empty states inside the Dynamic Template Shortcodes dialog.
The Dynamic Template Shortcodes dialog (shortcodes-dialog.jsx) hands out shortcodes for the current design so it can be used outside Gutenberg (Classic editor, Elementor's shortcode widget, any builder). These are the section framing, copy control and states not yet listed.
Live Badge (section)
#The first card. Bakes a vector copy of the current design whose bound texts are substituted server-side as the page is served, ideal for prices and dates. That substitution lands in the page itself, so behind a full-page cache the badge is as fresh as that cached page and no fresher; editing the post refreshes both. Vector content only; pixel layers embed as static images. The badge is not a pixel-perfect copy of the editor preview: the browser lays out its text and complex layer effects are simplified - use a Dynamic Image when the embed must match the design exactly.
Personalized Image (section)
#The second card. Maps text layers to URL parameters (for example ?name=Anna) and produces a shortcode that renders live in the visitor's browser. Requires the design to be saved as a dynamic template.
Dynamic Image (section)
#The third card. Produces a shortcode for a real baked image filled with the embedding post's data. Saves mark it stale and the next open editor session re-bakes it.
Copy
#The button next to each read-only shortcode field. Copies the shortcode to the clipboard, showing Shortcode copied. on success or Copy blocked if the browser refuses (then select and copy by hand).
Baking… / Re-bake badge
#The badge button shows Baking… while it works, then reads Re-bake badge once a badge exists. Re-bake after design changes; the shortcode itself stays the same.
Shortcode (chip)
#The small chip on each section header marking it as a shortcode-producing tool.
This design has no named text layers to personalize.
#Shown in the Personalized Image card when the saved template has no named text layers to map to URL parameters.
Save this design as a dynamic template first (File, then Save as Dynamic Template)
#Shown in the Personalized Image and Dynamic Image cards when the current document is not yet a saved template. The shortcodes reference the template id, so the design must be saved first.
Dynamic-image blocks: inspector options, help text and placeholders Pro 11 items #
The block-editor option values, busy labels, in-canvas placeholders and help text for the three dynamic-image Gutenberg blocks.
The Gutenberg blocks (blocks.js) put dynamic templates onto the site. Their block panels reuse the same Dynamic template picker and Width slider, but each has its own busy states, placeholders and help text documented here.
Select a template
#The first option in the Dynamic template dropdown of every dynamic-image block. Nothing renders until a real template is chosen.
Rendering…
#The busy label on the Render now button of the Dynamic Image block while it bakes the image.
Creating… / Create badge / Recreate badge
#The Live Badge block button reads Create badge first, Creating… while it stores the SVG, and Recreate badge once a badge exists. Once created, the badge also re-bakes automatically whenever its dynamic template is updated in the editor.
Pick a dynamic template in the block settings.
#The in-canvas placeholder shown by all three blocks before a template is selected.
Save the post (or press "Render now") to bake the image.
#The Dynamic Image placeholder once a template is chosen but no image has been baked yet.
Press "Create badge" in the block settings.
#The Live Badge placeholder once a template is chosen but no badge has been created yet.
Badge stored (%s).
#The Live Badge placeholder after a badge is saved. The front end fills it with the post's current data (the template name is shown).
Re-rendered automatically on every save (help)
#The Dynamic Image panel help text: the image re-renders on every save with the post's current data, and the front end serves a real image file.
A vector badge, filled server-side (help)
#The Live Badge panel help text: a vector badge whose bound texts the server fills in as the page is served, so it follows its post with no re-render, and behind a page cache it is as current as the page it sits on. Vector-only designs work best; the browser lays out the badge text, so it is close to but not pixel-identical with the editor preview - pick the Dynamic Image block for an exact copy.
Map text layers to URL parameters (help)
#The Personalized Image panel help text: mapping a layer to a parameter means visiting ?name=Anna replaces that layer's text live in the visitor's browser.
Block descriptions
#The one-line descriptions shown in the block inserter: Dynamic Image is a real image baked on every save; Live Badge is a vector badge substituted server-side; Personalized Image renders per visitor with URL-parameter substitutions.
Shortcode attributes and bake behavior Pro 6 items #
The attributes accepted by the three dynamic-image shortcodes and how they bake on the front end.
The shortcodes (class-blocks.php) mirror the blocks for non-Gutenberg builders. These are their attributes and the server-side bake behavior a user should know.
template (attribute)
#Required on [wpie_dynamic_image] and [wpie_personalized]. The id of the saved dynamic template to render. Without it the shortcode outputs nothing.
uid (attribute)
#Required on [wpie_live_badge]. The id of the stored badge SVG created when you baked the design.
width (attribute)
#Optional on all three shortcodes. The display width as a percent of the container. Values are clamped to the valid range.
map (attribute)
#Optional on [wpie_personalized]. Pipe-separated entries, each layer:param:fallback, mapping a text layer to a URL parameter with an optional fallback.
Bake-on-save and stale queue
#Every save (Classic editor, REST, WooCommerce sync, bulk edit) marks a post's dynamic images stale; the next open editor session re-bakes them. Until the first bake lands, [wpie_dynamic_image] shows the template preview. The save scan also walks Elementor (_elementor_data) and Bricks layouts; Divi shortcodes live in the content itself. Fresh entries get a short grace period so the saving editor session bakes them alone, and a registry entry whose baked attachment was deleted heals itself with a fresh file instead of retrying forever.
Live badge SVG limit
#A baked live badge SVG is sanitized (scripts, links and animation removed) and must stay under 4 MB, otherwise storing it is rejected.
Pro starter template packs Pro 23 items #
Pro adds 1404 extra starter templates in 29 packs, 17 of which bring their own gallery category, lifting the category chips from 12 to 29.
The free editor ships 255 starter templates in 12 built-in categories. Pro registers 29 additional packs on top through the editor's extension API, for 1404 extra templates. Seventeen of them are category packs that add a brand new chip to the gallery, and the remaining twelve are top-up packs of 45 templates each that fill out the categories the free editor already has. A category pack holds 42 or 64 templates depending on its subject; the Dynamic Posts pack is the small one, with 16 designs built around post bindings.
Pro templates behave exactly like the built-in starters: they are fully editable documents, not flattened images. Clicking one opens it as a new document, in its own tab where tabs are available. Everything you find them with in the free editor keeps working, including the category chips and the color search.
The pack JSONs live in the Pro package and are fetched lazily, so nothing downloads until the gallery lists packs for the first time. The packs need Free 1.257 or newer, since that version introduced pack-declared categories. On an older free editor the packs are skipped rather than breaking the editor, so the extra templates simply do not appear.
Seasonal & Holidays
#Category pack for seasonal and holiday posts. Adds its own chip to the gallery filter bar.
Travel & Places
#Category pack for travel, destinations and places. Adds its own chip to the gallery filter bar.
Beauty & Wellness
#Category pack for beauty, spa and wellness topics. Adds its own chip to the gallery filter bar.
Community & Engagement
#Category pack for community posts and audience engagement. Adds its own chip to the gallery filter bar.
Life Moments & Cards
#Category pack for life moments, greetings and cards. Adds its own chip to the gallery filter bar.
Gaming & Streaming
#Category pack for gaming and streaming channels. Adds its own chip to the gallery filter bar.
Clubs & Non-Profit
#Category pack for clubs, associations and non-profit work. Adds its own chip to the gallery filter bar.
Trades & Services
#Category pack for trades and local service businesses. Adds its own chip to the gallery filter bar.
Real Estate & Home
#Category pack with 44 templates for real estate listings and home topics. Adds its own chip to the gallery filter bar.
Cars & Mobility
#Category pack with 44 templates for cars, dealerships and mobility. Adds its own chip to the gallery filter bar.
Kids & Family
#Category pack with 44 templates for kids and family topics. Adds its own chip to the gallery filter bar.
Tech & SaaS
#Category pack with 44 templates for tech products and SaaS. Adds its own chip to the gallery filter bar.
Finance & Insurance
#Category pack with 44 templates for finance and insurance topics. Adds its own chip to the gallery filter bar.
Podcast & Video
#Category pack with 44 templates for podcast episodes and video channels. Adds its own chip to the gallery filter bar.
Pets & Vets
#Category pack with 44 templates for pets and veterinary practices. Adds its own chip to the gallery filter bar.
Fashion & Style
#Category pack with 44 templates for fashion and style topics. Adds its own chip to the gallery filter bar.
More Starter Templates
#The extras pack: 180 templates that do not add a category of their own. They carry the free editor's built-in category ids, 15 per category, so they top up all 12 built-in chips (Sales & Specials, Products & Launches, Events & Invites, Music & Nightlife, Food & Drink, Sports & Fitness, Business & Jobs, Tips & Courses, Quotes & Reviews, Editorial & Media, Data & Planning, Art & Posters) instead of appearing under a new one.
Starter Templates (tray)
#In the Asset Library tray under the canvas, the Starter Templates section lists the Pro templates alongside the built-in ones. Click a tile to open that template as a new document.
Starter Templates (full dialog)
#The Starter Templates tab of the full Asset Library dialog shows the same Pro templates with larger previews, the category chips and the color search.
Templates tab (New Image)
#On the Templates tab of the Create New Image dialog (File, then New, and the welcome start screen), the Pro packs appear below the built-in starters and above your own saved dynamic templates.
Pack subheading
#Each pack's templates are grouped under a subheading carrying the pack's label, the same way extension template packs are grouped, so you can see which pack a template came from.
Category chips
#The filter bar above the template grid. All is the default; the 12 built-in chips come first and the 16 Pro category chips are appended after them, for 28 categories. Clicking the active chip again clears the filter back to All.
Lazy loading
#Pack contents are fetched from the Pro package only when the gallery first lists packs, so the extra templates cost nothing until you open a template surface.
Elementor widgets Pro 5 items #
Dynamic Image, Live Badge and Personalized Image as native Elementor widgets - thin wrappers around the same shortcodes the Gutenberg blocks use.
Search for "WPIE" in the Elementor panel. Because the widgets render through the existing shortcodes, an Elementor update cannot break the output - worst case the widgets simply do not register. A toggle under the Widgets & Blocks tab in Settings switches the bridge on and off (default on).
WPIE Dynamic Image
#Picks a Dynamic Template and renders its auto-baked, data-bound graphic for the current post - including the optional campaign template with a from/until window. Saving the page in Elementor marks the instance stale, so the image re-bakes with the post's fresh values - the same applies to the shortcode inside Bricks layouts and Divi content.
WPIE Live Badge
#Renders a baked live badge by its UID (from the editor's Dynamic Template Shortcodes dialog); bound values are filled in as the page is served. It is an SVG laid out by the browser, so it looks close to but not pixel-identical with the editor design - use the Dynamic Image widget when the embed must match exactly.
WPIE Personalized Image
#Renders a personalized image from a dynamic template. Mapping happens in repeater rows - layer, URL parameter, fallback - with layer-name suggestions read from the selected template; a legacy text field (layer:parameter:fallback entries separated by |) still works when no rows are set.
Settings toggle
#the Widgets & Blocks tab in Settings enables or disables the widget registration. Existing pages keep working either way - the underlying shortcodes stay available.
Layer suggestions
#With a template selected, the Personalized Image panel lists the template's text layers and offers them as autocomplete suggestions in every mapping row.