Origami
Design the paper, watch it fold itself, then print the sheet and the instructions.
Origami overview Extension 4 items #
Design the paper, watch it fold itself, then print the sheet and the instructions.
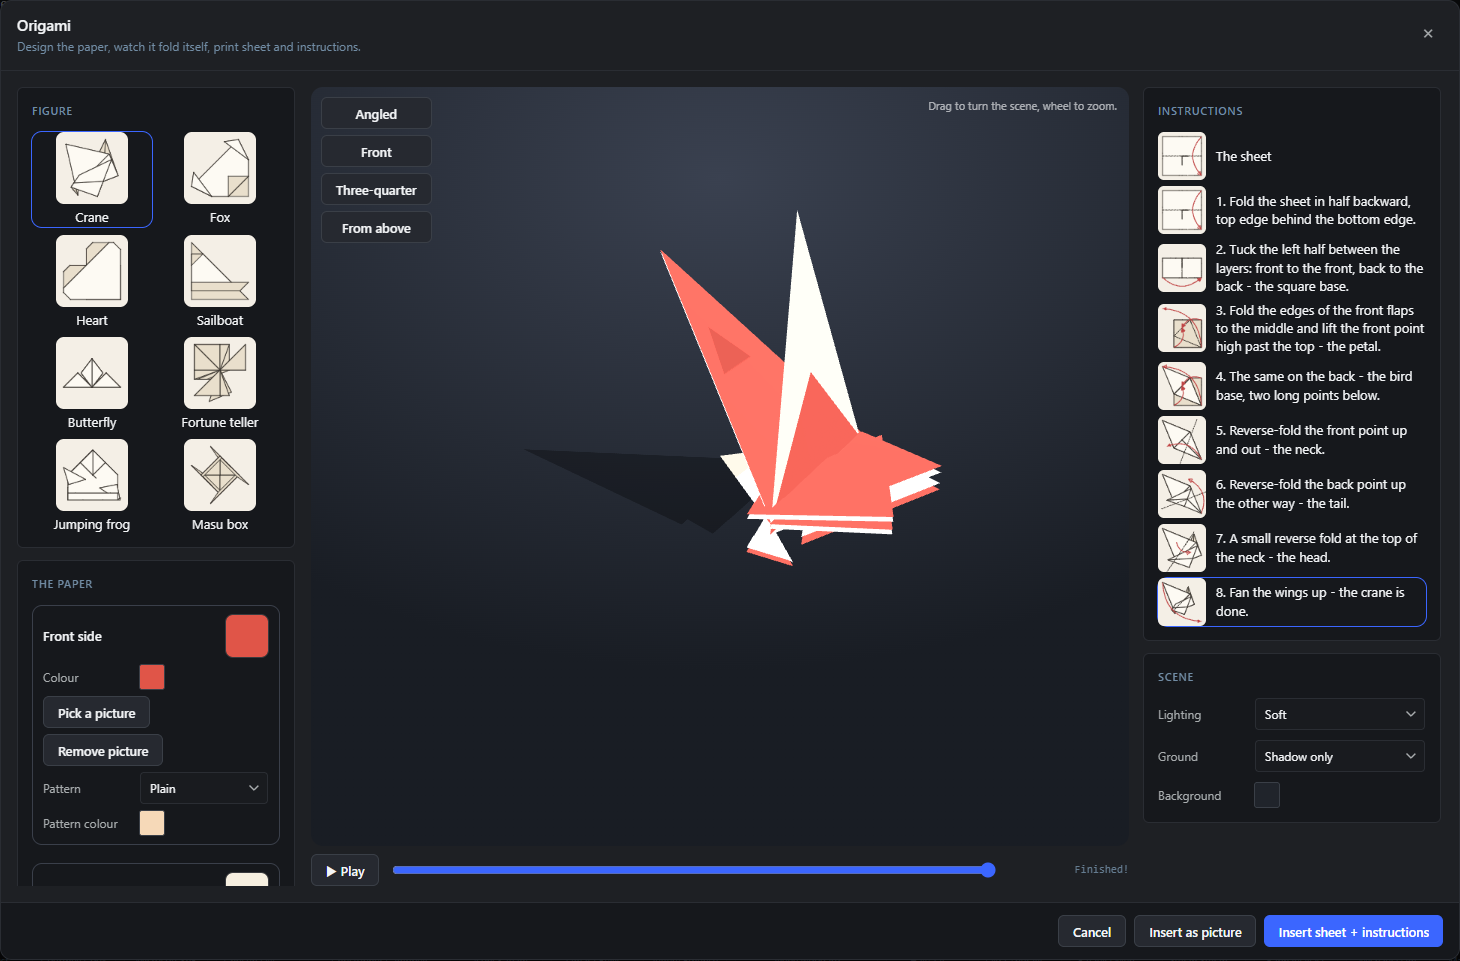
Design your own origami paper and watch it fold itself. Pick a figure, put your picture, color or pattern on both sides of the sheet, and the preview folds your very paper into the finished crane, fox or box, step by step.
Every step of the written instructions is a station in 3D: click it and the paper stands mid-fold in front of you, ready to be turned and studied from any side, which is exactly the moment printed diagrams leave you alone. A region map shows which part of the sheet becomes the head, the wings or the lid, so a face lands where a face belongs.
Open it from the Extensions menu. One click lays print-ready pages into the document: the folding sheet with cutting marks, the mirrored back for duplex printing, and classic instruction pages drawn from the same steps you just watched. Everything is computed in your browser.
Insert as picture
#Places the folded figure as it stands in the preview into your document, as a picture layer.
Insert sheet + instructions
#Lays the print ready pages into the document: the folding sheet, its mirrored back, and the instruction pages.
Rendering the pages
#The status shown while the sheet and the instruction pages are being drawn. Larger figures take a moment.
Cancel
#Closes the dialog and inserts nothing.
Figure Extension 9 items #
Which model the sheet is folded into.
Each card is a complete folding sequence. Switching the figure keeps the paper you designed and refolds it.
Crane
#The classic tsuru: bird base, reverse folds for neck and head, wings fanned at the end.
Fox
#A short sequence with two ear points and a folded snout.
Heart
#A flat heart, the usual card and garland shape.
Sailboat
#Two sails and a hull from a single square.
Butterfly
#Wings spread from a waterbomb base.
Fortune teller
#The school yard cootie catcher, with four pockets for the fingers.
Jumping frog
#A frog with pleated legs that actually hops when you flick it.
Masu box
#The traditional open box, with the same corner fold repeated on all four sides.
Show where things land
#Colors the flat sheet by region and names what each part becomes, so you can see which piece of your picture ends up as the head, the wings or the lid before you print.
The paper Extension 7 items #
What the sheet looks like, front and back.
The sheet has two sides and the fold shows both of them. Each side takes a color, a pattern or a picture of your own.
Front side
#The side that faces you on the unfolded sheet, and the one most of the finished figure shows.
Back side
#The reverse. It appears wherever the folding turns the paper over, which is what gives a crane its two toned wings.
Color
#The base color of that side, from the usual color popover including your brand kit swatches.
Pattern
#A printed pattern over the base color: Plain, Dots, Stripes, Zigzag, Stars or Checks.
Pattern color
#The ink the pattern is drawn in, separate from the base color underneath.
Pick a picture
#Uses an image from the media library as that side of the paper. The fold carries it, so you can watch where a face or a logo ends up.
Remove picture
#Drops the picture again and falls back to the color and pattern of that side.
The folding preview Extension 8 items #
Watching the fold, and stopping it wherever you like.
The preview is a real three dimensional scene, not a video. You can stop at any step and turn the half folded paper around.
Play
#Runs the whole folding sequence from the flat sheet to the finished figure.
Step slider
#Scrubs through the sequence by hand. The read-out shows which step of how many you are on, and says Finished at the end.
Instructions
#The written steps beside the preview. Each one is a station: click it and the paper jumps to that moment of the fold and stays there.
Turning the scene
#Drag to turn the scene, wheel to zoom. This is the part a printed diagram cannot do, and it is why a half folded step is worth looking at from behind.
Angled
#Camera preset: the default three quarter view from slightly above.
Front
#Camera preset: straight on, useful for judging symmetry.
Three-quarter
#Camera preset: turned further to the side, so layers separate visibly.
From above
#Camera preset: looking straight down, which matches how printed diagrams draw the sheet.
Scene Extension 3 items #
Light, ground and background of the preview, which is also what an inserted picture looks like.
These settings change the rendered scene, so they matter for Insert as picture. They do not affect the printed pages.
Lighting
#Soft for even, diffuse light, Warm for a golden key light, Dramatic for hard shadows and strong contrast, Studio for a clean product look.
Ground
#What the figure stands on: Shadow only for a cast shadow with no surface, Table for a visible plane, Mirror for a reflective floor, or None.
Background
#The color behind the scene. Leave it transparent to drop the folded figure onto a design of your own.
The printed pages Extension 4 items #
What Insert sheet and instructions actually puts into your document.
The pages are built from the same folding sequence you just watched, so the diagrams and the preview can never disagree. Everything arrives as editable layers.
Folding sheet
#The flat paper at print size with cutting marks, carrying the front side you designed.
Folding sheet, back
#The same sheet mirrored, so that printing it on the reverse lines the back side up with the front.
Print fold lines on the sheet
#Adds the crease pattern to the printed paper: mountain and valley folds marked where they belong.
Folding instructions
#Classic diagram pages, one drawing per step, with fold lines and arrows generated from the sequence.