Step Guides
Annotate a picture and keep every mark editable.
Step Guides overview ExtensionStep Guides 4 items #
Annotate a picture and keep every mark editable.
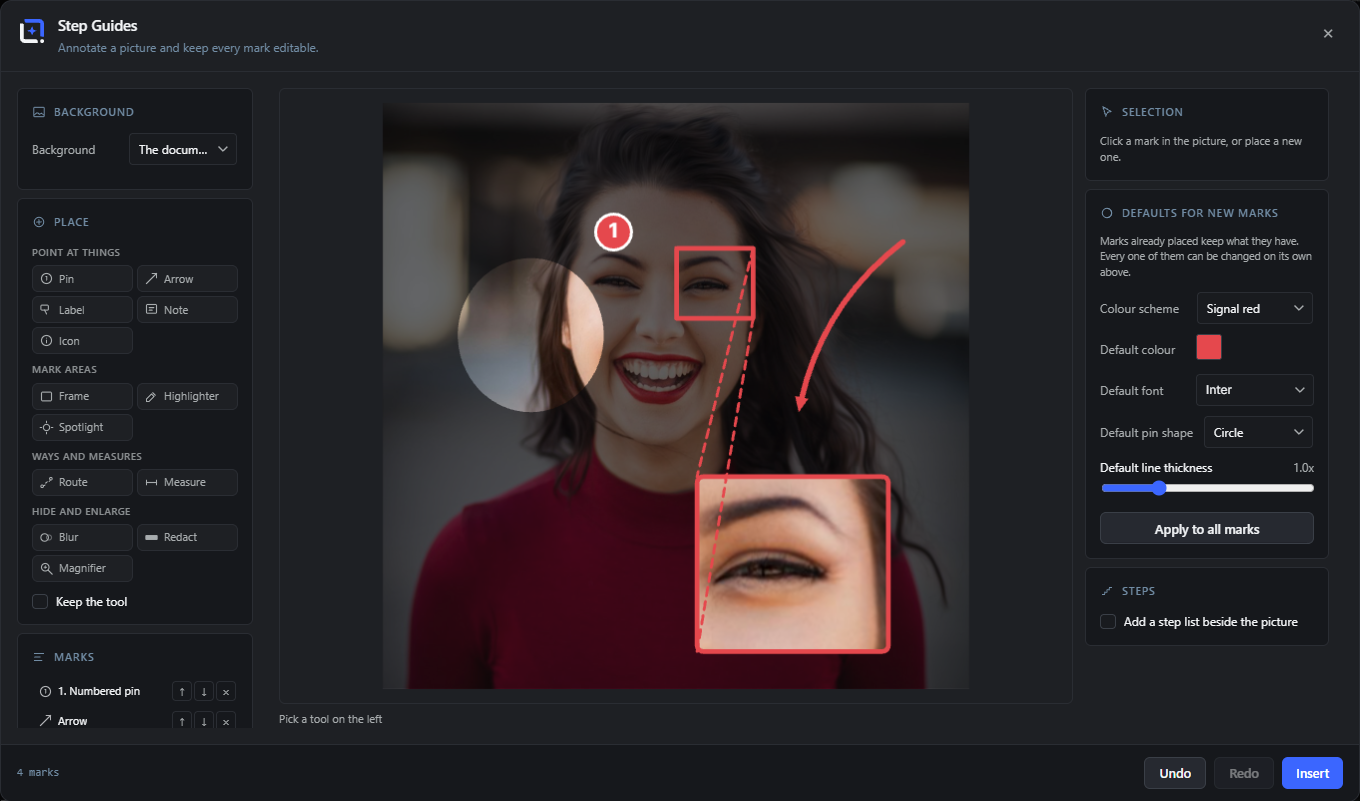
Turn any picture into an instruction and keep every mark editable. Every annotation is pinned to a place in the picture, so a leader still finds its target after the callout has been dragged across the frame, and a route still runs through its stations after a station has been moved.
The marks cover the whole job: numbered pins that renumber themselves when you insert a step, arrows that curve or turn at right angles with the head always on target, labels with smart leaders, sticky notes, frames and highlighter strokes, a spotlight that darkens everything but one area, blur, pixelate and a solid redaction bar, a magnifier that lifts a detail out and connects it back, measurements with turning labels, icon stamps from the editor's icon library, and routes through as many stations as you like, which also turns the same tool into a directions sketch over a map or a walkthrough of a floor plan.
Open it from the Extensions menu. The background is your document, a single layer of it, a media-library image or an upload, and everything lands as editable layers.
Insert
#Builds the marks as real shape and text layers, grouped, and closes the dialog. Reopen the group later with Edit Step Guides.
Update
#Replaces the layers of a guide you reopened, instead of adding a second copy.
%d mark(s)
#The counter in the footer. Insert stays disabled while it reads zero.
Click into the picture to place it
#Shown after you pick a mark type. Click once for point marks, drag for the ones defined by a rectangle or a line.
Background ExtensionStep Guides 5 items #
What the marks are drawn on top of.
The background is only the reference for the marks. It is not baked into the result, so the layers you get can sit on top of the document you were already working on.
The document
#Uses the whole document you have open as the picture to annotate. The default. When you edit an existing guide, the backdrop is the document without that guide, so the magnifier and blur always work on the clean design underneath.
A layer
#Uses one single layer instead of the whole document. Pick a layer appears next to it.
Pick a layer
#The layer chooser that appears once the background is set to A layer.
From the media library
#Annotates any image from the library rather than the open document.
Upload a picture
#Takes a file straight from your computer. It is read in the browser.
Place: the thirteen marks ExtensionStep Guides 14 items #
One button per kind of mark. Pick one, then click into the picture.
Numbered pins, notes and labels carry a step number and renumber themselves when you insert one in the middle. Frames, highlighter, spotlight, blur, pixelate, redaction and the magnifier are defined by a rectangle you drag; the rest are placed by their points.
Numbered pin
#A numbered dot. Insert a pin in the middle of a sequence and everything after it renumbers itself.
Arrow
#Points at something. The head stays on the target; the shaft can curve, run straight or turn at a right angle.
Label
#A text box with a leader. The leader leaves the box on the side that faces what it points at.
Note
#A sticky note in yellow with a slight tilt, for a remark rather than a label.
Frame
#A plain rectangle around a region worth looking at.
Highlighter
#A translucent marker stroke, as if drawn with a highlighter pen.
Spotlight
#Darkens the whole picture except one ellipse or rectangle.
Blur
#Blurs a region so it cannot be read. Strength sets how far.
Pixelate
#Not a marker of its own: it is an option of the Blur marker that coarsens the region into blocks instead of softening it. See the marker options for the strength dial.
Redact
#A solid bar over a region, for what should not be there at all rather than merely unreadable.
Magnifier
#Lifts a detail out, enlarges it beside the picture and draws the lines back to where it came from.
Measurement
#A dimension line with end ticks and a label that turns with the line.
Icon stamp
#Places an icon from the editor Tabler set as a mark.
Route
#A path through as many stations as you like, with station dots and an arrow at the finish. Turns the tool into a directions sketch or a walkthrough.
Options of the selected mark ExtensionStep Guides 10 items #
The controls that appear once a mark is selected, per kind.
Only the options that apply to the selected mark are shown, so the panel changes as you move through the list.
Text
#The wording of a label, a note or a measurement.
Shape
#Ellipse or Rectangle, for the spotlight and the region marks.
Strength
#How far the blur goes, or how coarse the pixelation is.
Magnification
#How much larger the magnifier draws the detail it lifted out.
Routing
#Smooth, Straight or Elbow: whether an arrow or a route curves, runs direct or turns at right angles.
Line style
#Solid, Dashed or Dotted, for arrows and routes.
Stations
#The points a route runs through. Add, move or remove them and the path follows.
Size
#The size of an icon stamp or a pin, relative to the picture.
Symbol
#Which icon an icon stamp shows.
Up, Down, Delete
#Reorder a mark in the list or remove it. Reordering a numbered mark renumbers the sequence.
Style ExtensionStep Guides 5 items #
One choice sets the whole look of every mark.
The color presets come in pairs of accent and ink so marks stay legible on both light and dark pictures. The spotlight and the redaction bar are always near-black regardless of the preset.
Colors
#Ten paired presets: Signal red, Electric blue, Highlighter, Amber, Ink on paper, Mint, Violet, Coral, Night and Blueprint.
Accent color
#Overrides the accent of the chosen preset with your own color.
Font
#The typeface for labels, notes, numbers and measurements, from the editor font catalogue.
Pin shape
#Circle, Rounded or Square, for the numbered pins.
Weight
#Scales the thickness of every stroke at once, so marks stay visible on a large picture.
Steps ExtensionStep Guides 1 item #
An optional numbered list beside the picture.
The list is built from the marks that carry a number, in their current order, so it stays in step with the picture.
Add a step list beside the picture
#Widens the result and writes the numbered marks out as a list next to the picture, with their text.